EMF, teneo & e4 example
LAST UPDATED: October 10, 2010.
This blog will cover creating an e4 and EMF example application. It uses teneo as the persistent store to store the data modeled in EMF. The example is complete start to finish. The blog is quite long but if you follow along, it should only take about 30 minutes to get a full, and useful RCP application up and running.
The components we need are:

To setup logging correctly we want to use slf4j. We’ll use springsource’s Enterprise Bundle Repository to obtain the plugins. The EBR plugins all start with com.springsource indicating their bundle repository source then followed by the actual bundle name and version com.springsource.<bundle name>-<version>.jar. You’ll need to get the bundles (group id, bundle id) versions 1.6.1
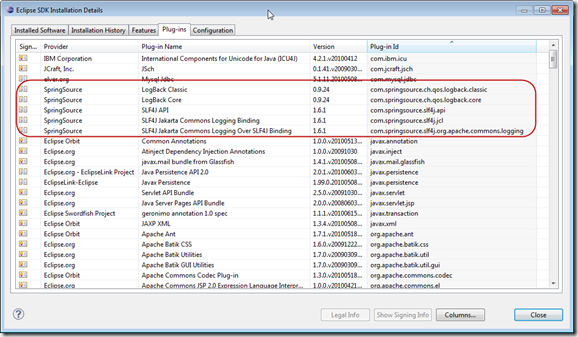
Just download these plugins and place into the plugins folder of the e4 SDK distribution directly. Restart the e4 platform to ensure that the are registered correctly. They should be auto-detected. You can confirm that the manually deployed plugins were found by checking the e4 platform’s installed plugins dialog window. Putting them into the dropins folder will not work because we are using the e4 installation as a target platform and the target platform “processing” does not understand the dropins folder inside an installation tree. You don’t have to place the 3rd party plugins into the e4 tree itself, you could keep them separate, but for our simple app, we wanted everything under one tree. You can look here for extensive blogging about target platforms.
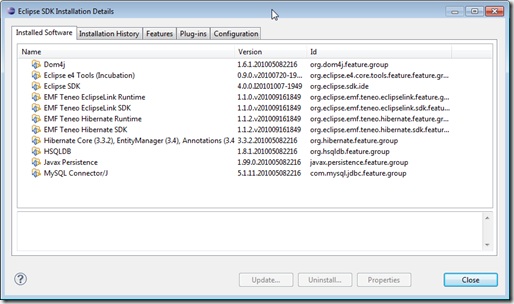
Here’s the list of plugins showing that the restart picked up the logging plugins that were manually deployed.
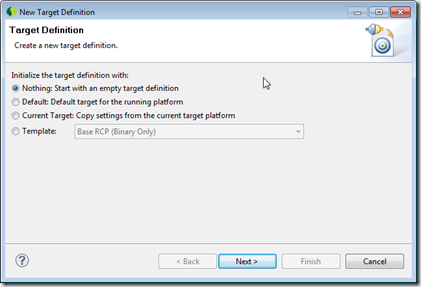
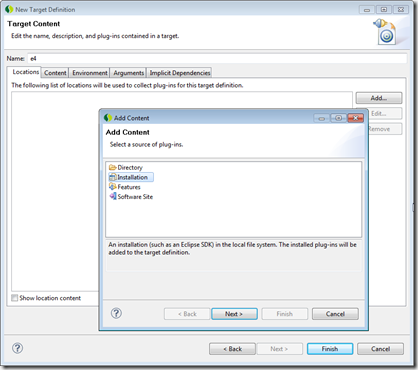
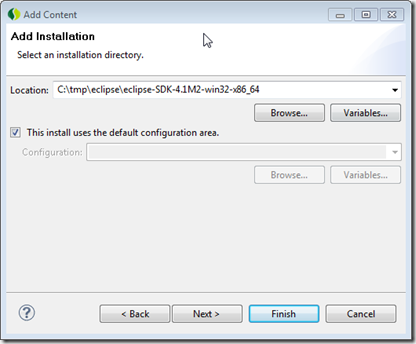
In your non-e4 SDK you are using for standard eclipse development, we need to create a target platform. Got to the Window>Preferences>Plug-in Development>Target Platform. Add a new target platform based on installation and point it to the e4 SDK toplevel folder to create the target platform.
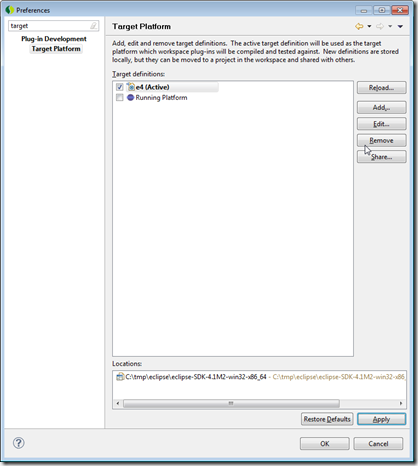
The SDK has a lot of plugins but its complete and appropriate for what we need and not worth the effort of further filtering. The target platform will be used automatically when we select it as the default and launch the application we will be writing. Target platforms do make it harder to debug because sources are not easily found but let’s assume we will not be debugging any of the dependent libraries and this issues is unimportant.
As the last step, we need to deploy the e4 plugins, which includes wizards and other project artifacts, into the current eclipse development environment. The steps we’ll follow are:
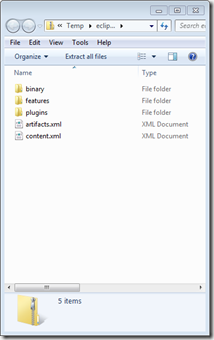
Just add these plugins treating it as a local site using Help>Install New Software.
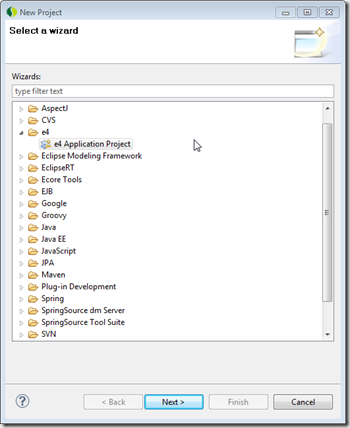
Create a new e4 application New>Project>e4>e4 Application Project
Name it like the following:
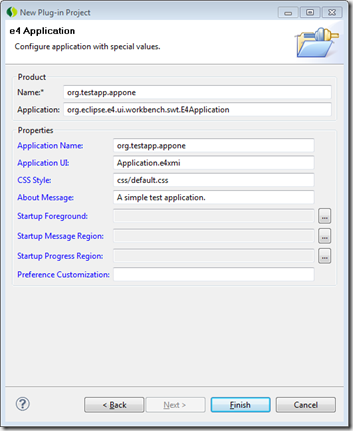
Open the Application.e4xmi file with the workbench editor (not the visual editor). You’ll see that the new e4 application already has some structure, such as a main menu, and some commands and handlers. The default quit handler asks if the user wants to quit the application then quits if the answer is yes.
To launch this small application, click on the Launch Product after opening the org.testapp.appone.product file:

You can see that using standard OSGi, there is an application that is specified to run called E4Application. This IApplication instance, provided by the eclipse team, sets up the eclipse context, finds the product specification in the plugin.xml file, and use the product specification to find the Application.e4xmi file that defines the application model. The application model is a serialized form of the EMF model that represents applications in e4.
You get the resulting application when you press “Launch an Eclipse Application".
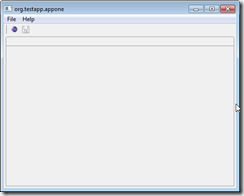
If you check the run configurations, you’ll see a new entry after you have run the application once. The plug-ins page shows that the target platform was used correctly but obviously, the logging and other plugins we added are not on the dependency list yet. We’ll need to ensure they are added as we build out the application of course.
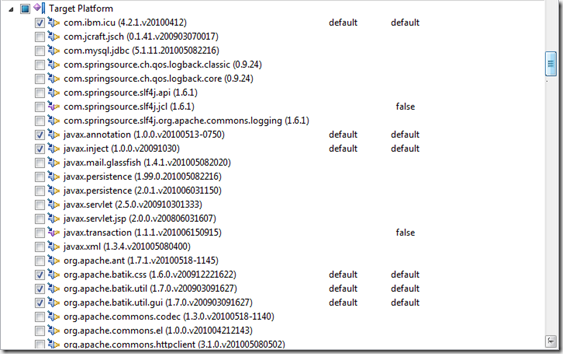
From now on, to run the application we can just use the Run file menu option and run the launch configuration corresponding to our application. If the target model ever changes, it’s fairly easy to update the launch configuration (including deleting it and relaunching the application from the product launch page) to recreate the launch configuration with the updated target platform or you can do it manually, which is what I typically do if its just a few plugins being changed at one time.
Here’s the Package Explorer view before we start our development effort:

First, File>New>Other>Eclipse Modeling Framework>Ecore Model:
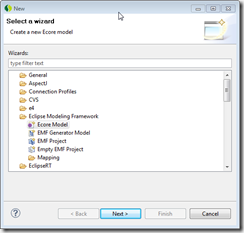
Call the model Hierarchy.ecore. Generate an ecore diagram for it using the right mouse button on the Hierarchy.ecore file:

The ecore diagram opens. Its empty of course because we do not have any content. Add some entities and attributes. This is the model. Quite simple. It has a name as the string attributes. We’ll add more later but this is fine for now. The number of levels of the hiearchy is built into the data structure. For the moment this is fine as well. One could imagine modeling this with a recursive relationship, but that is not key to this blog.
We’ll add containment references between all the entities. We’ll first add one way relationships going down, then one way relationships going up. By indicating that each of the pairs are EOpposites of each other, we’ll have the proper graph navigation semantics we desire.
You can see all of the downward relationships (references), all made 0..* and containment. In the picture below we have added one upward relationship as well from DataCollection to Grouping.
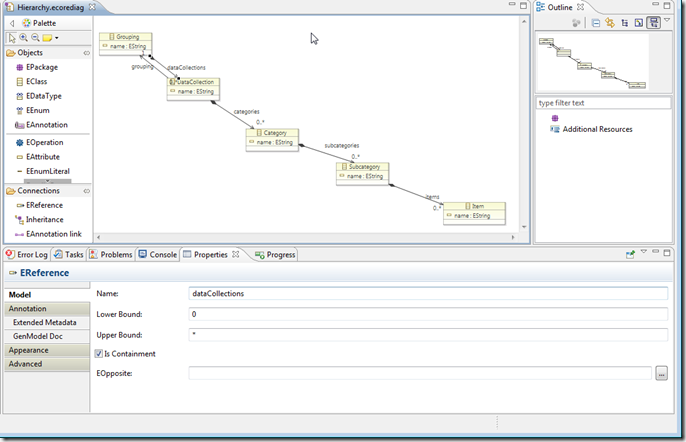
We need to add a few attributes to the model so it will generate correctly. Open the Hierarchy.ecore with the reflective model editor (using the right mouse context menu on the Hierarchy.ecore file). Bring up the properties view and add the following:

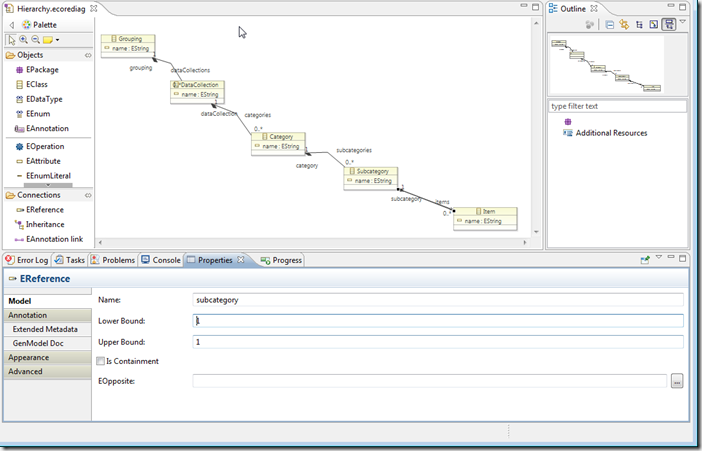
Then we add the upward relationships and set each pair as EOpposites of each other. Once you do this, they typically look like a single line in the image as shown below. The upward relationships are 1..1:
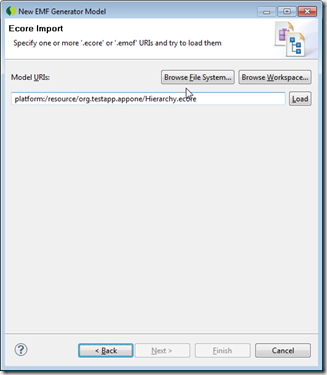
That’s our model. Lets create and configure the generator to generate the java code. First select the Hierarchy.ecore file in the Package Explorer. You’ll want to do this because the wizard can automatically detect that the currently selected file is an ecore file and fill in some default such as the destination project for the model generator file as well as the default name for the genmodel file. Then Select File>New>Other>Eclipse Modeling Framework>EMF Generator Model. Then after a few screens, select the model source, which is an ecore model called Hierarchy.ecore.
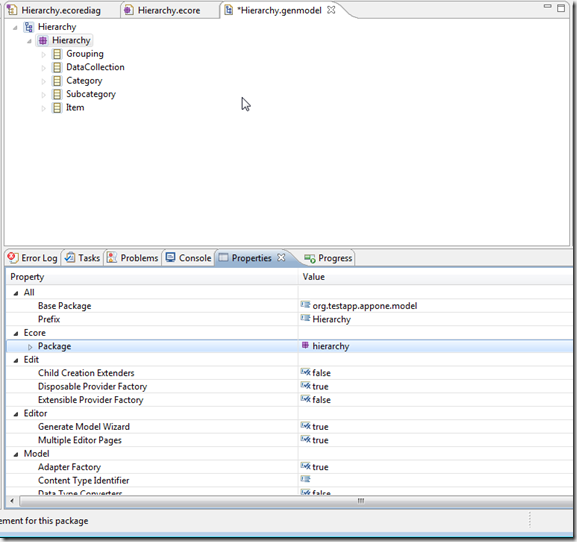
Hit Load then Next or Finish to create the generator. Open the generator file (it should open automatically) then selected the package level entry (hierarchy). Change the following properties so it looks like below. We just want to ensure it is generated into the right java base package+package.
Then run the generator by right clicking on the topmost entry in the genmodel file and create the Model and Edit bundles. Once we do that, we may have errors! If we look at the errors we see that the very entries for the model are not visible in the Edit package.
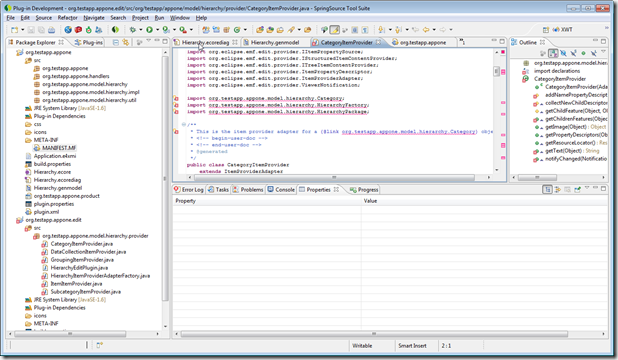
So we can merely go back to the org.testapp.appone bundle and export those packages so they are visible to other bundles. Open the org.testapp.appone MANIFEST.MF file and go to the Runtime tab. Add the packages that were created by EMF to the exported packages list.
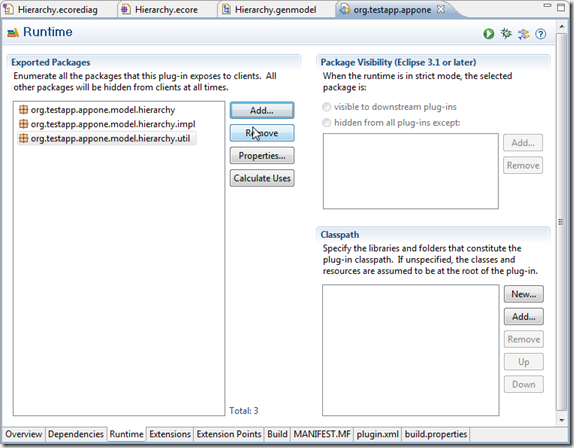
With this change the org.testapp.appone.edit bundle should compile correctly.
Now we will enable logging. We’ll want to start to control logging as we develop our application so we might as well configure it now. Logback logging is robust and easy to configure. We’ll use a XML file to configure it. Because logback’s plugin expects to find the logback.xml file at classpath root, the classpath root containing the logback.xml file must be accessible to the logback plugin. Since this is a resource file, versus a class, we’ll have to make the plugin containing the lagback.xml file a fragment to the logback plugin. We cannot make our main plugin a fragment, so we’ll create a new plugin as a fragment and place a single file into it. Other methods for configuring and architecting the logging infrastructure exist that you can look into. For production apps, its best to keep the configuration external to plugins so that it can be modified by the local user but for the testone application this method is fine.
Create a plugin called org.testapp.testone.logback using File>New>Project>Plugin Development>Fragment Project and create a Plug-in project. Create a logback.xml at the classpath root and put the following contents into it. Make the fragment’s host plug-in the core logback plugin as shown below.
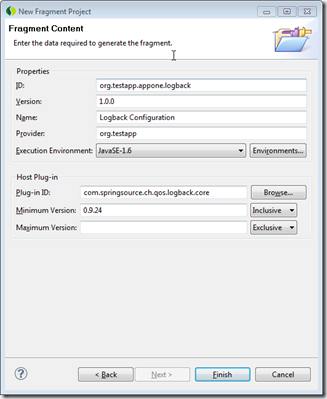
[NOTE: That should be the com.springsource.ch.qos.logback.classic plugin no the .core plugin]
You’ll want to add the org.testapp.testone.logback plugin as a dependency for your product by opening the .product file. Also add org.testapp.testone.edit and org.eclipse.emf.edit.
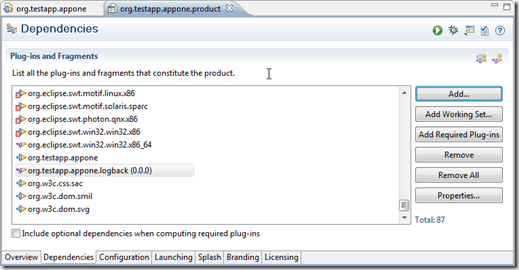
and also ensure that the plugin (along with the edit plugin and all logging plugins) are now added to the launch configuration that was created for you automatically. Don’t forget to ensure that org.testapp.appone.edit has also been added as well as org.eclipse.emf.edit.
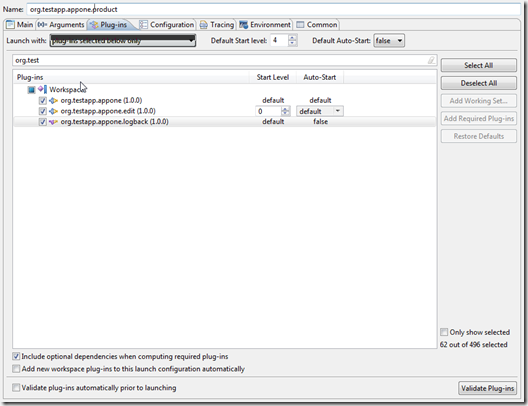
You can run the application using the Run launch configure to confirm that everything still works. Obviously, there is no linkage to the data model yet.
We’ll create a plugin whose only purpose is to launch the hsql database and store the persistent file in a location we can always find. Create a new java project called org.testapp.appone.rdbms using File>New>Project… and create a new java project.
Then add a build.xml XML file to the project’s top level directory using File>New>XML>XML File. Name it build.xml.
Add the following contents:
Copy the hsql plugin you added to the e4 target platform directory tree in the top level of this project. Its named com.springsource.org.hsqldb-1.8.0.9.jar in this case. You could use the newer version as well as the version used in e4 is used only for the client interface while the version used in this project is used to start and run the server—they can be different versions. Don’t forget the closing </project>. To run this, right click context menu the build.xml file and do Run As…>Ant Build file. Run the file. It will automatically create a launch configuration under Run External Tools using the name of the build file as the launch configuration name. You can use this launch configuration in the future to launch the server. To shut it down, go to the console window in eclipse where the output is displayed and hit the red button to stop the external process. There are more elegant approaches as well as we could add the ability to setup the db if we wish using a sql script, but we can add that late to the build.xml file when we need it. Go ahead and launch the build file and the db should start up. The appone db is created in the top level folder of the org.testapp.appone.hsql project.
Our basic requirements are:
This blog will cover creating an e4 and EMF example application. It uses teneo as the persistent store to store the data modeled in EMF. The example is complete start to finish. The blog is quite long but if you follow along, it should only take about 30 minutes to get a full, and useful RCP application up and running.
Problem Statement
You need an application to satisfy the following requirements:- The domain model is hierarchical. The domain model should be extensible so that other groups who adopt the application can change the domain model to their needs e.g. add an attribute to a domain model easily.
- You need to display the domain model using a tree model for easy user navigation.
- CRUD screens should be available, in some fashion, for all domain objects.
- The data should be stored in a RDBMS while minimizing any framework-specific extensions or RDBMS artifacts.
- There is no legacy integration requirement.
- The application, hypothetically, requires rich user interactions and is best implemented as an RCP.
- The application should support multiple users accessing the database simultaneously but the average # of simultaneous users is around 5 with a max of 10. The users would be globally distributed.
- Security should be handled directly in the application with no other dependencies on external directories, etc.
Configure the Development Environment
We’ll assume that you wish to use the e4 RCP environment but want to use your current eclipse version as the development platform. This means that we need to create a target platform with all the plugins that we wish to use. There are a couple of ways to do this, but we will take the quickest route. Our approach will be to:- Download the e4 latest SDK.
- Start e4 SDK up.
- Add plugins using the normal fashion by connecting to update sites or adding the plugins manually by hand.
- Shutdown e4.
- Configure a target platform based on the e4 SDK in the eclipse environment we configured above. You can use any eclipse environment but we suggest 3.6. I’m using STS 2.3.3 which is based on 3.6. The target platforms ensures you have a consistent base to compile and run against. Some firms checkin the target platform, created in this way, in order to have a stable target to develop against. It also allows a developer to use different eclipse development versions based on their needs versus forcing the same development environment on everyone—which is more difficult and frustrating to developers.
- Add the e4 plugins to your eclipse development environment. This ensures you have the wizards and other editors available as part of e4 development in your development environment. This is for a different purpose than the target platform.
The components we need are:
- e4 SDK. EMF does not generate e4-only EMF.Edit editors yet although they will work since they are mostly jface API but we will address this as we go through the process.
- Teneo, version 1.2 is required with eclipse 3.6. There are no recommendations from the teneo team on which version to use for e4 but since e4 runs on the latest EMF, we’ll use teneo 1.2.
- hsqldb v1.8
- Setup logging using slf4j.
- Download the SDK here: e4 downloads page. In this case, I grabbed the 0.11M2 build but just grab the latest.
- Now, unzip the SDK appropriate for your platform into a directory that we will label for the purposes of this blog: E4_HOME. On my machine, I placed the zip into a directory c:\tmp\eclipse\eclipse-SDK-4.1M2-win32-x86_64.
- Start the SDK up as you normally would be clicking on eclipse.exe. Specify an empty workspace so you do not inadvertently update your standard workspace.
- Obtain teneo. You can check here teneo home page for the teneo version you should use. For the moment, use the one associated with eclipse 3.6 which is teneo version 1.2.0 minimum. We’ll use the hibernate version. Follow the instructions for installing teneo found at teneo installation instructions. You’ll need teneo 1.2 for EMF 2.6+. You’ll also need to install some dependencies. Install all of the dependencies except MySQL (we’ll use HSQL) and the logging plugins.

To setup logging correctly we want to use slf4j. We’ll use springsource’s Enterprise Bundle Repository to obtain the plugins. The EBR plugins all start with com.springsource indicating their bundle repository source then followed by the actual bundle name and version com.springsource.<bundle name>-<version>.jar. You’ll need to get the bundles (group id, bundle id) versions 1.6.1
org.slf4j, com.springsource.slf4j.api, located hereorg.slf4j, com.springsource.slf4j.org.apache.commons.loggingorg.slf4j, com.springsource.slf4j.jclorg.slf4j, com.springsource.slf4j.bridgech.qos.logback, ch.qos.logback.classic-library, latest versionch.qos.logback, com.springsource.ch.qos.logback.core, latest version
Just download these plugins and place into the plugins folder of the e4 SDK distribution directly. Restart the e4 platform to ensure that the are registered correctly. They should be auto-detected. You can confirm that the manually deployed plugins were found by checking the e4 platform’s installed plugins dialog window. Putting them into the dropins folder will not work because we are using the e4 installation as a target platform and the target platform “processing” does not understand the dropins folder inside an installation tree. You don’t have to place the 3rd party plugins into the e4 tree itself, you could keep them separate, but for our simple app, we wanted everything under one tree. You can look here for extensive blogging about target platforms.

Here’s the list of plugins showing that the restart picked up the logging plugins that were manually deployed.

In your non-e4 SDK you are using for standard eclipse development, we need to create a target platform. Got to the Window>Preferences>Plug-in Development>Target Platform. Add a new target platform based on installation and point it to the e4 SDK toplevel folder to create the target platform.


The SDK has a lot of plugins but its complete and appropriate for what we need and not worth the effort of further filtering. The target platform will be used automatically when we select it as the default and launch the application we will be writing. Target platforms do make it harder to debug because sources are not easily found but let’s assume we will not be debugging any of the dependent libraries and this issues is unimportant.
As the last step, we need to deploy the e4 plugins, which includes wizards and other project artifacts, into the current eclipse development environment. The steps we’ll follow are:
- Download the e4 plugins from the eclipse site. This is different than downloading the e4 SDK that includes a development workbench and such. In this step, you are only downloading the plugins that make up e4 and that can be used to create a local site to install from.
- Unzip them into a directory.
- Use the new directory with e4 as a “local” to add software from.
- Run the Help>Install New Software dialog, point to the local site and add the plugins.

Just add these plugins treating it as a local site using Help>Install New Software.
Create the e4 Application
To test our new environment, we need to create a small e4 test application. This will help us validate that the development environment is setup correctly. We will create a small app that will grow into something larger.Create a new e4 application New>Project>e4>e4 Application Project

Name it like the following:

Open the Application.e4xmi file with the workbench editor (not the visual editor). You’ll see that the new e4 application already has some structure, such as a main menu, and some commands and handlers. The default quit handler asks if the user wants to quit the application then quits if the answer is yes.
To launch this small application, click on the Launch Product after opening the org.testapp.appone.product file:

You can see that using standard OSGi, there is an application that is specified to run called E4Application. This IApplication instance, provided by the eclipse team, sets up the eclipse context, finds the product specification in the plugin.xml file, and use the product specification to find the Application.e4xmi file that defines the application model. The application model is a serialized form of the EMF model that represents applications in e4.
You get the resulting application when you press “Launch an Eclipse Application".

If you check the run configurations, you’ll see a new entry after you have run the application once. The plug-ins page shows that the target platform was used correctly but obviously, the logging and other plugins we added are not on the dependency list yet. We’ll need to ensure they are added as we build out the application of course.

From now on, to run the application we can just use the Run file menu option and run the launch configuration corresponding to our application. If the target model ever changes, it’s fairly easy to update the launch configuration (including deleting it and relaunching the application from the product launch page) to recreate the launch configuration with the updated target platform or you can do it manually, which is what I typically do if its just a few plugins being changed at one time.
Create the EMF Model
We’ll create a simple hierarchical EMF model that models our domain data. The toplevel naming will be org.testapp.appone for the models and the application. We’ll mostly develop our application in one plugin although we will have some smaller plugins contributing to our application.Here’s the Package Explorer view before we start our development effort:

First, File>New>Other>Eclipse Modeling Framework>Ecore Model:

Call the model Hierarchy.ecore. Generate an ecore diagram for it using the right mouse button on the Hierarchy.ecore file:

The ecore diagram opens. Its empty of course because we do not have any content. Add some entities and attributes. This is the model. Quite simple. It has a name as the string attributes. We’ll add more later but this is fine for now. The number of levels of the hiearchy is built into the data structure. For the moment this is fine as well. One could imagine modeling this with a recursive relationship, but that is not key to this blog.
We’ll add containment references between all the entities. We’ll first add one way relationships going down, then one way relationships going up. By indicating that each of the pairs are EOpposites of each other, we’ll have the proper graph navigation semantics we desire.
You can see all of the downward relationships (references), all made 0..* and containment. In the picture below we have added one upward relationship as well from DataCollection to Grouping.

We need to add a few attributes to the model so it will generate correctly. Open the Hierarchy.ecore with the reflective model editor (using the right mouse context menu on the Hierarchy.ecore file). Bring up the properties view and add the following:

Then we add the upward relationships and set each pair as EOpposites of each other. Once you do this, they typically look like a single line in the image as shown below. The upward relationships are 1..1:

That’s our model. Lets create and configure the generator to generate the java code. First select the Hierarchy.ecore file in the Package Explorer. You’ll want to do this because the wizard can automatically detect that the currently selected file is an ecore file and fill in some default such as the destination project for the model generator file as well as the default name for the genmodel file. Then Select File>New>Other>Eclipse Modeling Framework>EMF Generator Model. Then after a few screens, select the model source, which is an ecore model called Hierarchy.ecore.

Hit Load then Next or Finish to create the generator. Open the generator file (it should open automatically) then selected the package level entry (hierarchy). Change the following properties so it looks like below. We just want to ensure it is generated into the right java base package+package.

Then run the generator by right clicking on the topmost entry in the genmodel file and create the Model and Edit bundles. Once we do that, we may have errors! If we look at the errors we see that the very entries for the model are not visible in the Edit package.

So we can merely go back to the org.testapp.appone bundle and export those packages so they are visible to other bundles. Open the org.testapp.appone MANIFEST.MF file and go to the Runtime tab. Add the packages that were created by EMF to the exported packages list.

With this change the org.testapp.appone.edit bundle should compile correctly.
Now we will enable logging. We’ll want to start to control logging as we develop our application so we might as well configure it now. Logback logging is robust and easy to configure. We’ll use a XML file to configure it. Because logback’s plugin expects to find the logback.xml file at classpath root, the classpath root containing the logback.xml file must be accessible to the logback plugin. Since this is a resource file, versus a class, we’ll have to make the plugin containing the lagback.xml file a fragment to the logback plugin. We cannot make our main plugin a fragment, so we’ll create a new plugin as a fragment and place a single file into it. Other methods for configuring and architecting the logging infrastructure exist that you can look into. For production apps, its best to keep the configuration external to plugins so that it can be modified by the local user but for the testone application this method is fine.
Create a plugin called org.testapp.testone.logback using File>New>Project>Plugin Development>Fragment Project and create a Plug-in project. Create a logback.xml at the classpath root and put the following contents into it. Make the fragment’s host plug-in the core logback plugin as shown below.

[NOTE: That should be the com.springsource.ch.qos.logback.classic plugin no the .core plugin]
You’ll want to add the org.testapp.testone.logback plugin as a dependency for your product by opening the .product file. Also add org.testapp.testone.edit and org.eclipse.emf.edit.

and also ensure that the plugin (along with the edit plugin and all logging plugins) are now added to the launch configuration that was created for you automatically. Don’t forget to ensure that org.testapp.appone.edit has also been added as well as org.eclipse.emf.edit.

You can run the application using the Run launch configure to confirm that everything still works. Obviously, there is no linkage to the data model yet.
Create a RDBMS Database
We will use hypersonic sql (HSQL) for our database in file mode. Memory mode would drop the object storage between runs and we want something persistent. Running HSQL requires us to start a process outside of eclipse. We could do this several ways. We could do this, for example, by running it as an external tool using eclipse’s external tool capability. However, this would make the running of HSQL dependent on having eclipse running eventually we would to deploy without eclipse. We need a run script of some type. We could use gradle, which is a groovy inspired maven-like build tool. However, we’ll use the most common tool available, ant. We need an ant script that runs hsql with the startup parameters we want to specify.We’ll create a plugin whose only purpose is to launch the hsql database and store the persistent file in a location we can always find. Create a new java project called org.testapp.appone.rdbms using File>New>Project… and create a new java project.
Then add a build.xml XML file to the project’s top level directory using File>New>XML>XML File. Name it build.xml.
Add the following contents:
Copy the hsql plugin you added to the e4 target platform directory tree in the top level of this project. Its named com.springsource.org.hsqldb-1.8.0.9.jar in this case. You could use the newer version as well as the version used in e4 is used only for the client interface while the version used in this project is used to start and run the server—they can be different versions. Don’t forget the closing </project>. To run this, right click context menu the build.xml file and do Run As…>Ant Build file. Run the file. It will automatically create a launch configuration under Run External Tools using the name of the build file as the launch configuration name. You can use this launch configuration in the future to launch the server. To shut it down, go to the console window in eclipse where the output is displayed and hit the red button to stop the external process. There are more elegant approaches as well as we could add the ability to setup the db if we wish using a sql script, but we can add that late to the build.xml file when we need it. Go ahead and launch the build file and the db should start up. The appone db is created in the top level folder of the org.testapp.appone.hsql project.
Create the RCP Application Database Connection and Navigation.
We now have a database, a skeleton e4 application and a domain model. We are read to actually create the application content specific to the domain model of interest. We’ll customize some screens to the domain model in the next section. In this section, we want to create the basic navigation and connections to the database from our application so we can then focus on application specific domain logic only.Our basic requirements are:
- The UI will show the toplevel Groupings as the highest level in a tree view. Each referenced (related) domain object, such as DataCollection, will show under their respective Grouping owner.
- There will be a main navigation tree view on the left and a central area for “editors” in the middle to right. The editors area will be similar to eclipse’s editor area.
Comments
Post a Comment